Monday, December 31, 2012

Welcome 2013

I want start out this year with a peaceful heart. I'm tired of rushing the day away.  It’s always wake up, hurry up to get to work or to an appointment. It's always rush, rush, rush.  No wonder so many of us have high blood pressure, or problems with stress. I am just tired of the high paced life we live, I really am. So, I am going to start the New Year with the mind set of keeping it "Light and Simple". That's going to be my motto for the year.
The thing is, if we somehow get ourselves to slow down whether it is through yoga, meditation, a vacation or prayer, as soon as we jump back into the rat race of life, everyone around starts rushing you and the stress starts all over again. It's a vicious circle. So, we do what we can to be centered and relaxed.  I am going to strive to start 2013 by learning to live my life based on this Dalai Lama quote. Anyone else want to join me?

Happy New Year!

Saturday, December 22, 2012

Wine and Cheese Party

My daughter was born on New Years Eve, almost 30 years ago. ( I still can't believe she is going to be 30...where did the years go?)  I decided to celebrate her birthday a week early.  Since she likes to have wine and cheese at most get togethers.  I thought I would base the party around that.  So, I went with a "Wine & Cheese" Party theme. I set up the dining room table with grapes, wine bottles ( 2 white & 3 red) an assortment of cheeses and crackers.  I also used wine scented and colored candles.  I thought I would share a few pictures with you.


Happy 30th Birthday Nicole!

Sunday, December 16, 2012

A Pretty Christmas Table.

My sister set up this beautiful table for our family Christmas party. She was inspired by The Longwood Garden table. Her home was so full of Christmas spirit.  It was such a wonderful family party.

Thursday, December 6, 2012

Carol's Candy Jar

My friend Carol gave her Diva's a cute little candy jar as a Christmas gift. I just love it. She used jelly jars and paper Christmas doilies. Next, she filled it with peppermints, then added a little bow and then put some garland around the top.  Simple and adorable.
Oh my,  this jar has her doilie up.

A Candy jar full of sweets and love.
Thanks Carol!

Friday, November 30, 2012

Christmas Pumpkins

My fall pumpkins are lasting forever.  A few began to go soft but a few are still hard and fresh.  I just didn't have the heart to get rid of them, so I decided to make them become a part of my Christmas decorations.  All I needed were a few hard pumpkins and a can of gold spray paint.  How simple and I really love how they turned out.   Here are a few pictures.  Enjoy!
A finished Christmas Pumpkin

Gold Spray paint & the pumpkins

How cool are these?

Wednesday, November 14, 2012

Holiday Napkin Holders

Last night, I spent the evening with a few of my Diva girls.  We enjoyed a pot luck dinner, with a few glasses of wine and some tasty deserts.
Then we moved into the dining room to make a holiday craft.
I had three long grapevines that I had bought about four years ago and never used them.  This gave me an idea to make a few small wreaths that you could use in various ways.  You could use them as napkin holders, small wreaths, toppers for wine bottles or even as an ornament for your Christmas tree or garland.

This was a super easy craft (once I got past the soaking & cutting of the grapevine).  I hope you enjoy them as much as we do.


Soak your grapevine garland in warm water overnight.  This will make it easier to cut and work with.

Cut about a foot in a half of the vine. 

A sample, you can make them bigger if you like. 

Oh, we had a pot luck dinner before we crafted.

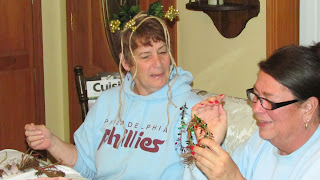
These Diva's are so funny!

Divas busy crafting

Silly Diva's

A few colorful samples.


The finished products


Monday, October 29, 2012

Trick or Treat !

Owl Cupcakes

My daughter had an after "Halloween parade" party at her house.   I decided to make owl cupcakes to bring to the party. I suppose I was sticking with her owl theme, because she made the most adorable owl costumes for herself and my grandchildren.  These cupcakes were easy to make and fun to eat.


Supplies needed: Sandwich cookies, yellow cake mix, chocolate and vanilla icing,
candy corn and junior mints.

After you bake and ice the cupcakes all you need to do is split the cookies in half
and use the iced side for the eyes, candy corn for the beak,
Junior mints for the eyes ( put a little icing on a junior mint to use as glue to apply the eyes). Next, use a small piece of cookie for the ears.
It's so easy the kids would love to help out making these cupcakes.

Thursday, October 25, 2012

Owl Craft

Owls are everywhere anymore. Everywhere you look, there are some cute little owls looking back at you.  I saw these cute little buggers at a local craft store and I knew I had to make them for my grand babies. They turned out just adorable.  So, here is how you make them.


Supplies needed: colored felt, Styrofoams balls, googly eyes, glue gun

Cut felt into approximately 15 feathers in two different colors. Cut the bottom off the
Styrofoam ball so that it will sit on the table.

Next, start gluing the feathers from the bottom of the ball to the top and overlap them.
I used the lighter colors as the owls belly feathers.
 
Cut two large circles and two small circles for eyes. Glue them
on top of each other then glue the google eyes. Cut a triangle for the beak
and two triangles for the ears. Also, cute a triangle out for the top.


Walla, how cute are these little guys? 

I added them to my pumpkin table.  Then gave them to my little ones.
My grandaughter just loved them.

Wednesday, September 19, 2012

Crafts With The Girls

This weekend was most likely my last, at the Jersey Shore for this year.  I had a great time catching up with my sister, as well as spending time with my friends. I am posting a few pictures of the Autumn wreaths and wine glasses that we made.


Supplies needed. I just used some Fall colored scrapbook paper.
I used different colors from the book and cut them in the size of leaves.

This step probably took the longest.  I cut the leaves
while hanging out with my family.


I then glued them on using tacky glue but you can also use a glue gun.
I glued one in the center, then one on each side and just worked them
around the Styrofoam circle. You can use whatever pattern you want.

You can't see it in the pictures but I hot glued a brown ribbon
on the outside of the wreath to cover up the white from the
Styrofoam. Just pick a ribbon the size of the rim.

Here are a picture of my sister's and my wreath.
I just love how they turned out.
Now, I need to break out some mums and pumpkins to decorate the rest of the house.

Friday, September 7, 2012

Basket of Apples

Today was the end of the first week of school, so I decided it would be nice to put a basket of apples out for my teachers.
I just put an apple kitchen towel in the basket and filled it with farm fresh, local apples and added a cute owl ribbon.   I hope they enjoy the crisp apples. 

I love fresh crisp Apples !

Tuesday, August 28, 2012

Owl Cake

Recently I made a couple of cakes and decorated them with fondant owls. (Owls are very popular right now).  One of them I made for a staff''s "Baby Sprinkle".  I made a test cake and then the cake I used for the shower.  I used pound cake mix instead of a regular box cake. The shapes were cut out using cookie cutters or fondant cutters.  I taped a video to share with you.


Wednesday, August 8, 2012

Wine Glass Painting

I knew while on vacation a few weeks ago,we were going to have a wine tasting night. We usually go to a winery, but this year we decided to make a game of it.  Each couple had to bring a bottle of white wine and a bottle of red wine.  I printed out a  "How to Taste Wine" as well as a, wine tasting game from the Internet.
With all this in mind, I thought it would be fun to paint our own wine glasses. so the night before I set up a table with plain, dollar store wine glasses and a hand full of those "Sharpie Paint Pens". You can get them at any craft store. We each took a glass and a few paint pens and decorated our own wine glass. My goal, was to make them look like those expensive wine glasses you see in gift shops. It was fun and some of the wine glasses turned out better then others. They were painted and ready to fill with wine the next evening.
The wine tasting game was interesting too.  Our husband put an adult twist to it, but I wont go into that (keeping it friendly here).  Ha, Ha!  We had a blast!


A Toast, to a fun filled vacation.